Signal integrity simulation before, during and after PCB design:
'via Blog this'
Saturday, September 28, 2013
Friday, September 20, 2013
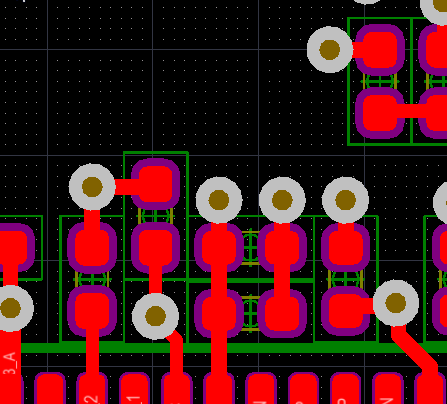
Grid Settings - Easy on the Eyes
The default bright white grid lines and dots are a bit distracting and hard on the eyes.
For a softer look that is easier on the eyes the color setting for the grid lines and dots can the adjusted.
Select Ctrl + G to bring up the Cartesian Grid Editor dialog.
As shown I have set the Dots to a med gray (color 34) and the Lines to a light shade of black (color 38).

Here is what the results look like.
Click on Image to View
For a softer look that is easier on the eyes the color setting for the grid lines and dots can the adjusted.
Select Ctrl + G to bring up the Cartesian Grid Editor dialog.
As shown I have set the Dots to a med gray (color 34) and the Lines to a light shade of black (color 38).
Here is what the results look like.
Click on Image to View
Thursday, September 19, 2013
Toolbars - Move to Another PC
Refer to Link: Altium Forum Search:
C:\Users\username\AppData\Roaming\AD {<GUID>}
Where GUID is a long Set of Hex characters.
Use File Search if needed to locate the files shown below on your computer.
Copy the following files and paste it to the same location on your new PC.
DXP.RAF
DXP.RCS
UserTools.TLT
Altium has to be closed, during this precedure, or else your copied files will be overwritten.
These files are overwritten when Altium is Closed.
If you are frequently updating your Toolbars, then Synctoy can be used to simplify this task.
'via Blog this'
Update Schematic from Library
Altium BugCrunch #839 :
Position of refdes after update from library.
Position of refdes after update from library.
- Open SCH List Panel. Select All Objects > Include only Parts.
- Copy current Orientation, and Mirror-status to a spreadsheet.
- Set to 0 and non-mirrored.
- Perform library update.
- Copy spreadsheet data over SCH List data to recover original positions.
Friday, September 13, 2013
Excel - Conditional Formatting for Matched Net Lengths
Below is an example of using Green / Red (Go / No-Go) Conditional Formatting in Excel for checking matched trace length requirements.

Example


Example

Tuesday, September 10, 2013
Create a Custom Toolbar
See Altium Designer - addons: UI customizations

Right Click on and empty space in the menu bar and select Customize . . .
Select Toolbar Tab and Create a New Toolbar

Select the Commands Tab, then [Custom] then New

For Process Select: ScriptingSystem:RunScript

Enter the Parameters, Example:
ProjectName=C:\Altium_RJC\Altium_Central\Scripts\Via Soldermask Barrel Relief\Via Soldermask Barrel Relief.PrjScr|ProcName=Via Soldermask Barrel Relief.pas>Start
Enter a Caption and Description.
Select an existing Altium Command Button or Create your own Button.
AD14 Buttons are installed at:
"C:\Program Files (x86)\Altium\AD14\System\Buttons"
Drag and Drop The New Command Button to your Custom Toolbar


You can also easily add a Hot key (keyboard short cut) to any command button or menu by holding down the Ctrl Key and double clicking the left mouse button.
Example to Export Hyperlynx in AD15

Sunday, September 8, 2013
Altium Script - Via Soldermask Barrel Relief
Updated Via Soldermask Barrel Relief (9-11-2013 11-24-56 AM)
PCB fabricators may request permission to apply Soldermask Barrel Reliefs to your tented vias when the via's hole sizes are 18mil or larger in size. Consult with your fabricator as the requirements vary between suppliers.
For more about Soldermask Barrel Reliefs see : Via Barrel Reliefs - PCB Designer Blog

Fabricators specify the barrel reliefs with respect to the via hole size. For example drill hole size + 5mil is typical.
The +5mil soldermask relief accounts for registration and process tolerances.

To Force Complete Tenting
Tenting vias on one side can trap chemicals and fluxes in the via barrels which can corrode away the copper plating in the via barrels. This is a reliability issue.
Reference: Soldermask on via-holes in case of chemical Nickel-Gold surface finish
Subscribe to:
Posts (Atom)